Are you tired of taking cold showers because your water heater isn’t working properly? It might be time to check your thermocouple.
This small but crucial component ensures your water heater stays lit and functions efficiently. Replacing or installing a new thermocouple might sound daunting, but don’t worry—it’s easier than you think! You’ll discover step-by-step guidance to help you confidently handle the installation.
Say goodbye to unexpected cold showers and hello to a reliable water heating system that works seamlessly. Keep reading to learn how you can save time, money, and frustration by mastering this simple DIY task.
Tools And Materials Needed
Installing a water heater thermocouple might seem daunting, but with the right tools and materials, it becomes a manageable task. Whether you’re a DIY enthusiast or just looking to save some bucks, knowing what you need is half the battle. Let’s dive into the essential tools and materials that will make your installation process smooth and efficient.
Tools Needed
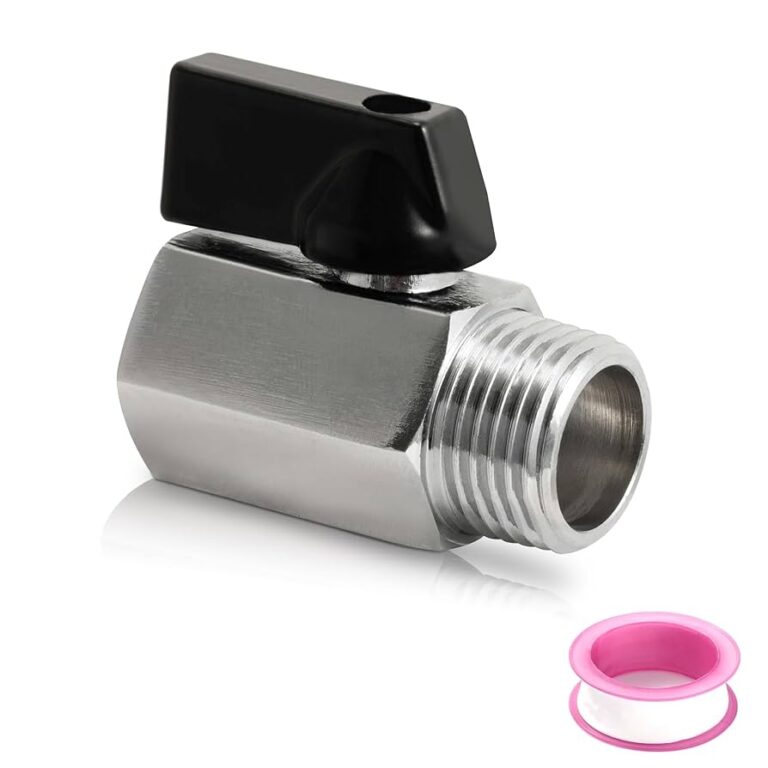
- Adjustable Wrench:A must-have for loosening and tightening nuts. It comes handy when detaching the old thermocouple.
- Screwdriver:Opt for a Phillips and a flathead. These will help you remove the panel covering the thermocouple.
- Pliers:Use these for gripping and twisting wires. They ensure a firm grip on small parts during installation.
- Multimeter:This tool checks the current flow, ensuring the new thermocouple is functioning properly. It’s worth investing in if you don’t already own one.
Materials Needed
- Replacement Thermocouple:The star of the show. Make sure you choose one that matches your water heater’s specifications.
- Cleaning Cloth:Essential for wiping off dust and debris. A clean surface helps secure the connection.
- Wire Strippers:If your thermocouple requires wire trimming, these will make the job easier and safer.
Each tool and material plays a pivotal role in ensuring your thermocouple installation goes off without a hitch. Think back to a time when you tried assembling furniture without the right tools—it was frustrating, right? Avoid that hassle by gathering everything before you start.
Imagine the satisfaction of completing the task with ease. Isn’t that a great feeling? Equip yourself well, and you’ll be surprised at how smoothly the process unfolds. What tools have you previously underestimated, only to realize their importance later?
By focusing on the details, you minimize the risk of errors. A little preparation goes a long way. So, take charge of your DIY project and make the installation a success!
Credit: www.homedepot.com
Safety Precautions
Ensure safety by turning off the water heater’s power and gas supply before installing a thermocouple. Use proper tools and wear protective gloves to prevent burns and injuries. Always follow the manufacturer’s instructions for a secure installation.
Installing a water heater thermocouple is a task that many homeowners might attempt themselves, driven by the desire to save on repair costs. However, this seemingly straightforward task comes with its own set of risks. Safety should always be your top priority during installation to prevent accidents and ensure your water heater functions properly.Understanding The Basics Of A Thermocouple
A thermocouple is a crucial component of your water heater, acting as a safety device that shuts off the gas supply if the pilot light goes out. Installing it incorrectly can lead to gas leaks or the heater not functioning at all. Make sure you have a basic understanding of how it works before starting the installation.Turn Off The Gas Supply
Before you even think about touching the water heater, turn off the gas supply. This is a crucial step to prevent any gas leaks while you’re working. Look for the gas valve and turn it to the off position.Ensure Adequate Ventilation
Working in a confined space without proper ventilation can be dangerous. Make sure the area is well-ventilated to avoid inhaling gas fumes. Open windows and doors if necessary.Use The Right Tools
Using the wrong tools can lead to mistakes and safety hazards. Ensure you have the right size wrenches and screwdrivers before you start. If you’re unsure about the tools, consult the water heater’s manual.Wear Protective Gear
Always wear protective gear such as gloves and safety goggles. This will protect you from any accidental spills or debris that might occur during installation.Double-check Connections
After installing the thermocouple, double-check all connections to ensure they’re secure. Loose connections can lead to gas leaks, posing a serious safety risk. Make sure everything is tightened properly before turning the gas back on.Test The Installation
After completing the installation, test the water heater to ensure everything is working correctly. Light the pilot light and observe for any irregularities. If something seems off, don’t hesitate to call a professional for assistance.Know When To Seek Professional Help
Sometimes, it’s better to call in the experts. If you feel unsure about any step during the installation, don’t risk it. Professional help can ensure the job is done safely and correctly. Have you ever tried installing a thermocouple yourself? What challenges did you face, and what lessons did you learn? Share your experiences and insights to help others avoid common pitfalls.Identifying The Thermocouple
Discover the thermocouple in your water heater, a small device ensuring safe operation. It detects heat levels, preventing gas leaks. Proper installation is crucial for efficient function and safety.
Identifying the thermocouple in your water heater can feel like finding a needle in a haystack, especially if you’re not familiar with the setup. However, pinpointing this small but crucial component is essential for a smooth installation process. Let’s make this task simple and straightforward.What Is A Thermocouple?
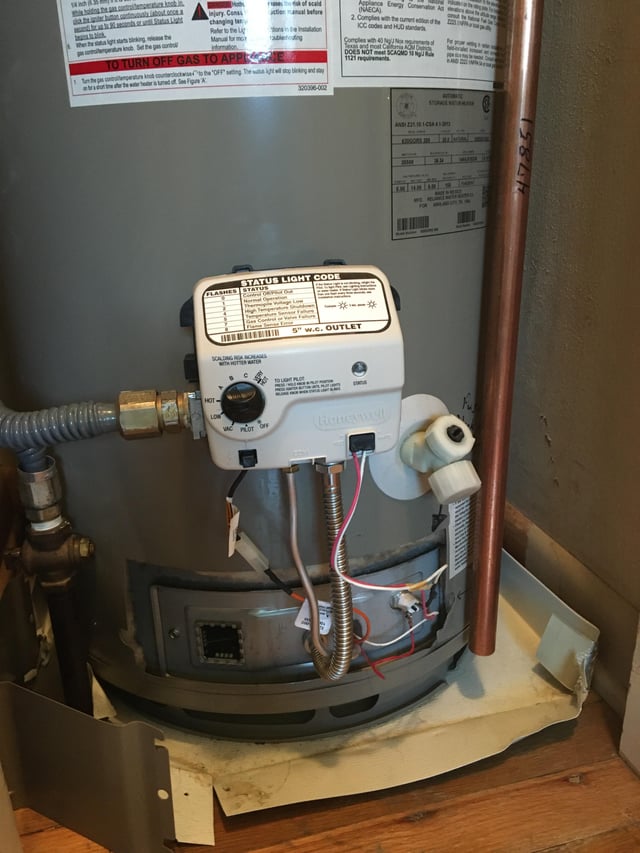
A thermocouple is a safety device that ensures your water heater functions properly. It detects whether the pilot light is on and shuts off the gas supply if it’s not. This prevents gas leaks, which can be dangerous. Have you ever wondered why your water heater suddenly stops working? A faulty thermocouple might be the culprit.Locating The Thermocouple
Start by turning off the gas supply to your water heater. Safety first! Then, remove the access cover to view the burner assembly. You’ll typically find the thermocouple near the pilot light. It’s a small metal rod, usually copper, connected to the gas control valve. Once, I spent hours searching before realizing it was right there, snug next to the pilot. Don’t make the same mistake!Checking The Thermocouple Condition
Inspect the thermocouple for any signs of wear or damage. Is it bent or broken? These are indicators it needs replacing. A working thermocouple should be straight and free from rust. When was the last time you checked yours? Regular maintenance can save you headaches later.Compatibility With Your Water Heater
Ensure the new thermocouple is compatible with your water heater model. This prevents installation issues. Check the length and connector type. Compatibility is key to a successful replacement. Have you ever bought the wrong part and had to make a return trip? Avoid this by double-checking before purchasing.Why Proper Identification Matters
Correctly identifying the thermocouple ensures your water heater functions safely and efficiently. It’s a small step that can prevent larger, costly repairs down the line. Are you ready to tackle this task and keep your water heater running smoothly?
Credit: www.lowes.com
Removing The Old Thermocouple
Removing the old thermocouple is a crucial step in water heater maintenance. This process ensures your water heater runs smoothly and efficiently. A faulty thermocouple can lead to unexpected issues. Follow these steps to remove the old thermocouple safely.
Turning Off The Gas Supply
First, turn off the gas supply to the water heater. Locate the gas valve on the unit. Turn it to the “off” position. This step is essential for safety. Gas leaks can be dangerous. Ensure the valve is completely shut before proceeding.
Detaching The Burner Assembly
Next, detach the burner assembly from the water heater. Use a screwdriver to remove screws securing the panel. Carefully pull the assembly out. You will see the thermocouple connected to the burner. Handle the components gently to avoid damage.
Once detached, identify the thermocouple. It is a small metal wire. Disconnect it from the gas control valve. This step requires precision. Avoid bending or breaking nearby components.
Installing The New Thermocouple
Replacing a water heater’s thermocouple is simple and essential for proper function. Locate the thermocouple near the pilot light and disconnect it. Attach the new thermocouple securely, ensuring a tight connection for optimal performance.
Installing the new thermocouple in your water heater might seem intimidating, but with the right guidance, you’ll find it’s a straightforward process. The thermocouple is a small yet crucial component that ensures your heater works efficiently and safely. Whether you’re a seasoned DIY enthusiast or a first-timer, understanding each step will make a big difference. Let’s dive into how you can successfully position and secure your new thermocouple.Positioning The Thermocouple
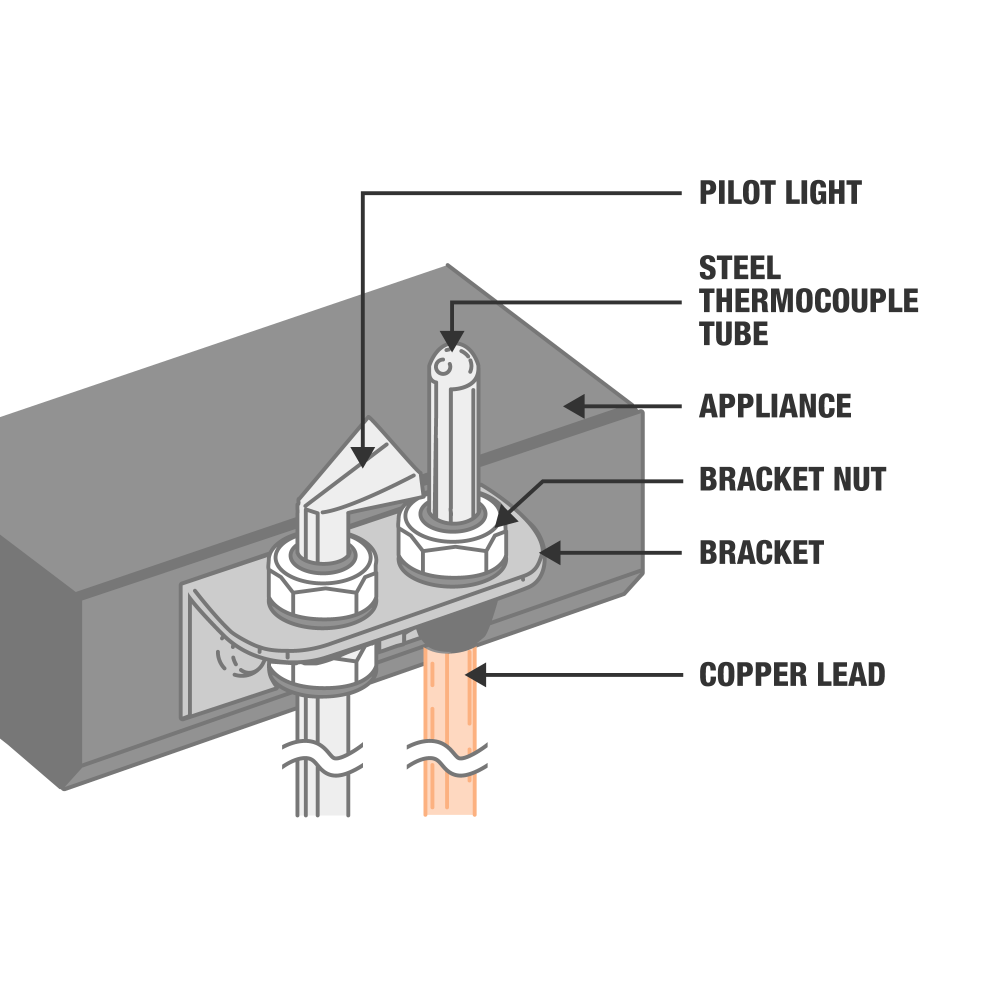
The positioning of your thermocouple is essential for optimal performance. Begin by locating the pilot light assembly, which is usually at the base of your water heater. Once you have the assembly in sight, slide the new thermocouple into place, ensuring it sits snugly next to the pilot flame. If it’s too far away, it might not detect the flame, causing your heater to malfunction. Have you ever faced a situation where your heater wouldn’t light? Often, it’s due to incorrect thermocouple placement. Make sure the tip is directly in the flame path for accurate temperature readings.Securing The Thermocouple
Securing the thermocouple is a crucial step to ensure it stays in place. Use a wrench to tighten the thermocouple nut, ensuring it’s firm but not overly tight. You don’t want to strip the threads or damage the nut, which can lead to leaks or poor conductivity. One tip from my experience: after securing, gently tug on it. It should resist movement but not be overly rigid. This ensures a stable connection without risk of damage. Ask yourself, have you ever checked how tight your connections are? Loose fittings can cause inefficiency and potential safety hazards. By taking your time to secure the thermocouple properly, you’re ensuring a safer and more efficient water heater operation. This small effort can prevent future headaches and ensure your heater runs smoothly.
Credit: servicewhale.com
Reassembling The Water Heater
You’ve replaced your water heater’s thermocouple. Now, it’s time to reassemble everything. This is a crucial step. A proper reassembly ensures safety and efficiency. Follow these simple steps to get your heater back in shape.
Reconnecting The Burner Assembly
Start by reconnecting the burner assembly. This part is essential for heating water. Place the burner back into its designated spot. Ensure it’s secure and aligned properly.
Use screws to fasten the burner. Tighten them with a screwdriver. Double-check everything is firm and stable. This prevents any gas leaks or inefficiencies.
Turning On The Gas Supply
With the burner assembly in place, turn on the gas supply. Locate the gas valve near your heater. Turn it to the “on” position.
Listen for any unusual sounds. Smell for any gas odor. If all seems well, proceed. This ensures the heater functions safely and effectively.
Testing The Installation
Ensuring proper installation of the water heater thermocouple requires careful testing. Confirm the thermocouple connection by observing the pilot light. If it stays lit, the installation is successful.
Testing the installation of your water heater thermocouple is a crucial step that ensures your heating system is functioning safely and efficiently. After installing a new thermocouple, it’s essential to verify that everything is working correctly. This process not only confirms the success of the installation but also helps prevent potential issues down the line.Checking The Pilot Light
First, inspect the pilot light. A steady flame indicates the thermocouple is functioning correctly. If the flame is flickering or goes out, it might suggest a problem with the thermocouple installation. Consider the last time your pilot light went out unexpectedly. Did you check if the thermocouple was secure? This step can save you from future inconvenience.Monitoring The Water Temperature
Once the pilot light is steady, monitor the water temperature. You should notice consistent warmth in the water after a few minutes. If the temperature fluctuates, there might be an issue with the thermocouple connection. Imagine taking a shower only to find the water suddenly turns cold. Ensuring stable water temperature prevents this from happening.Listening For Unusual Noises
Listen closely for any strange noises coming from the heater. Clicking or hissing sounds could be signs of improper thermocouple installation. Does the sound remind you of a rattling pipe? It’s a clue that something might need tightening or adjusting.Conducting A Safety Check
Finally, conduct a safety check. Ensure there are no gas leaks around the thermocouple. A simple soap and water solution can help detect leaks by forming bubbles. Have you ever smelled gas near your heater? This test can provide peace of mind knowing your installation is secure. Testing the installation isn’t just about technical checks; it’s about ensuring comfort and safety in your home. What steps do you take to confirm your heater’s reliability?Troubleshooting Common Issues
Installing a water heater thermocouple often involves troubleshooting common issues. Ensure proper alignment and secure connections to avoid malfunctions. Regular checks and maintenance can prevent unexpected failures.
When your water heater starts acting up, it can disrupt your daily routine. One common culprit is the thermocouple. This small but crucial component ensures your gas water heater operates safely. Troubleshooting its issues can save you from unnecessary cold showers. Below, we’ll walk through common problems and how you can tackle them with confidence.Identifying Thermocouple Problems
A malfunctioning thermocouple can prevent your water heater from staying lit. This often happens due to dirt accumulation or a misaligned position. Check if your pilot light keeps going out. A faulty thermocouple might be the reason.Checking For Loose Connections
Loose connections can hinder the performance of your thermocouple. Inspect the fittings where it attaches to the gas valve. Ensure they are tight. Even a slight looseness can cause issues.Cleaning The Thermocouple
Dirt and debris can block the thermocouple’s ability to function properly. Use a piece of fine-grit sandpaper to gently clean the surface. This simple step can often restore its efficiency.Adjusting The Thermocouple Position
The thermocouple should be positioned correctly relative to the pilot flame. If it’s too far, it won’t detect the heat. Reposition it carefully, ensuring it’s directly in the path of the flame.Replacing The Thermocouple
Sometimes, cleaning and adjustments aren’t enough. You might need to replace the thermocouple altogether. Purchase a compatible model and follow manufacturer instructions for installation.Testing After Troubleshooting
After making adjustments or replacements, test your water heater. Light the pilot and observe if it stays lit. A successful fix means you’ve tackled the issue effectively. Have you ever had to troubleshoot a thermocouple? How did it go? Sharing your experiences or questions can help others in similar situations.Conclusion
Installing a water heater thermocouple can seem challenging. Yet, with the right tools, it becomes manageable. Always ensure safety first. Turn off gas and electricity before starting. Follow each step carefully. Double-check connections to avoid leaks. Testing the thermocouple ensures proper function.
If unsure, consult a professional. Regular maintenance prolongs the heater’s lifespan. Understanding these basics helps keep your water heater running smoothly. Proper installation saves time and money. Enjoy reliable hot water without worry. Keep these tips handy for future reference.