Are you planning to upgrade your plumbing skills by connecting PEX to your water heater? You’re not alone.
Many homeowners are choosing PEX piping for its flexibility, durability, and cost-effectiveness. But how do you ensure a secure and efficient connection?
This guide is your go-to resource for a smooth installation process. Imagine enjoying reliable hot water without the hassle of leaks or costly repairs.
With just a few simple tools and steps, you can achieve how to connect pex to water heater with ease. Stick around, and you’ll discover the secrets to a worry-free water heater connection that saves you time and stress. Let’s dive in and empower you to tackle this task confidently.
Choosing Hot Water Heater Pex Fittings
Choosing the right PEX materials is crucial for connecting PEX to a water heater. PEX, or cross-linked polyethylene, offers flexibility and resistance to scale and chlorine.
Types Of Pex Tubing
PEX-A, PEX-B, and PEX-C are the three main types.
PEX-A is known for its flexibility and ease of installation. It is the most resistant to kinks.
PEX-B is the most common and offers a good balance of cost and durability.
PEX-C is slightly less flexible but can be a budget-friendly option. Each type has its benefits depending on your needs and budget.
Essential Tools And Supplies
Gathering the right tools ensures a smooth connection process.
A PEX cutter is necessary for clean cuts.
Use a crimp or clamp tool to secure connections. Ensure you have crimp rings or clamps suitable for your PEX type.
A PEX expander tool may be needed for certain fittings. Always have a go/no-go gauge to check fitting accuracy.
Safety Precautions to Connect Pex to Water Heater
Proper precautions ensure a successful installation and prevent costly mistakes. Focus on handling PEX safely and protecting against water damage.
Handling Pex Safely
Always wear gloves when working with Pex tubing for hot water. PEX can have sharp edges that may cause cuts. Use a cutter specifically designed for PEX to make clean cuts. Avoid using regular scissors or knives, as they can damage the tubing.
Ensure the area is well-lit. Poor lighting can lead to mistakes and accidents. Keep the workspace tidy. Loose tools or debris increase the risk of injury.
Protecting Against Water Damage
Check for leaks immediately after installation. Even small leaks can lead to major water damage. Use a flashlight to inspect connections thoroughly. Tighten any loose fittings to prevent drips.
Consider using a drip pan under the water heater. This provides extra protection against unexpected leaks. Ensure the area around the water heater is dry and clear of any water-sensitive materials. Regular checks help catch leaks early and minimize damage.
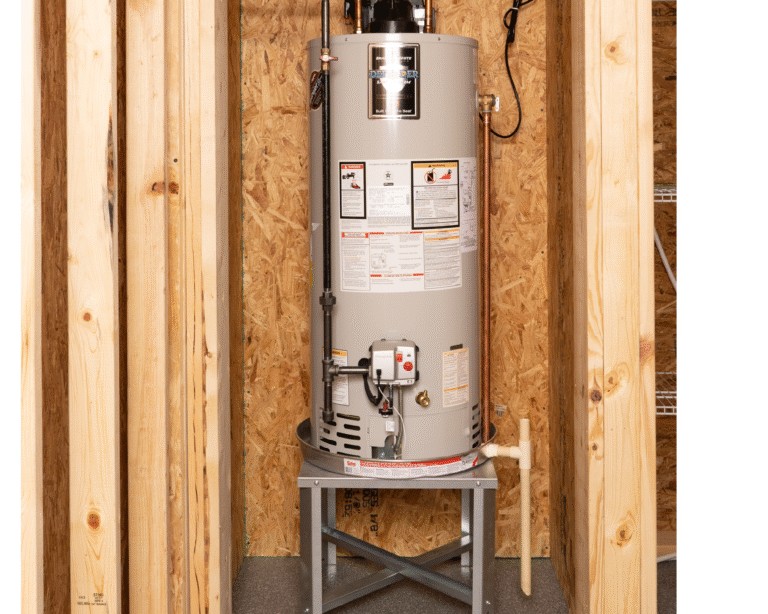
Preparing The Workspace For Pex Water Heater Connector
Connecting PEX to your water heater requires careful preparation. A well-organized workspace ensures efficiency and safety. Start by preparing the area, which is crucial for a smooth installation process. Follow these essential steps to get your workspace ready for action.
Step 1: Shutting Off Water Supply
First, turn off the water supply to your home. Locate the main shut-off valve and rotate it clockwise. This stops water flow and prevents leaks during the installation.
Double-check that the water is indeed off by testing faucets. Confirm that no water flows from taps. This ensures a dry environment for your project.
Step 2: Clearing And Organizing The Area
Next, clear the area around the water heater. Remove any items that may obstruct your work. This includes cleaning supplies, boxes, or stored items. A clear space allows easy access to the heater.
Arrange tools and materials neatly. Keep essential tools within reach for convenience. Use a toolbox or organizer to keep everything in order.
A bright workspace reduces errors and enhances safety. Use portable lamps if needed. Prepare the floor by laying protective coverings.
This prevents damage from dropped tools or parts. A tidy workspace sets the stage for a successful installation.
Cutting And Measuring Pex For Water Heater
Connecting PEX to a water heater requires precision. Proper cutting and measuring are crucial. This ensures a secure and leak-free connection.
#1: Accurate Measurement Techniques
Begin by measuring the required PEX length. Use a tape measure for accuracy. Ensure the tape is straight and taut. Measure twice to avoid mistakes. Mark the measurement with a pencil. This helps in cutting precisely.
#2: Using A Pex Cutter
A PEX cutter is a vital tool. It provides clean and straight cuts. Position the cutter at the marked spot. Squeeze the handles firmly. Ensure the cut is smooth with no rough edges. This prevents leaks and fits perfectly.
Fitting Pex To Water Heater
Connecting PEX to a water heater involves simple steps for a secure fit. Cut the PEX to the required length. Attach it to the water heater using compatible fittings, ensuring a tight connection.
Connecting PEX to your water heater can simplify your plumbing tasks and improve efficiency. PEX, known for its flexibility and durability, is an excellent choice for homeowners looking to tackle a DIY plumbing project.
But how do you ensure a secure and leak-free connection between your PEX tubing and water heater? Here’s a detailed guide to help you through the process of fitting PEX to your water heater effectively.
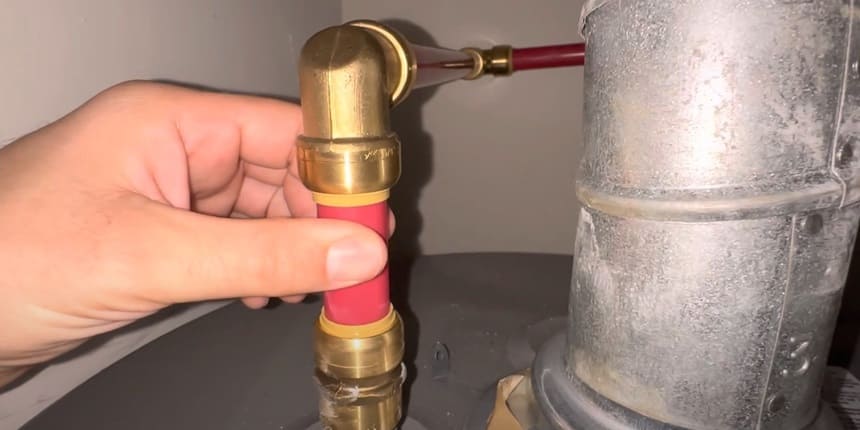
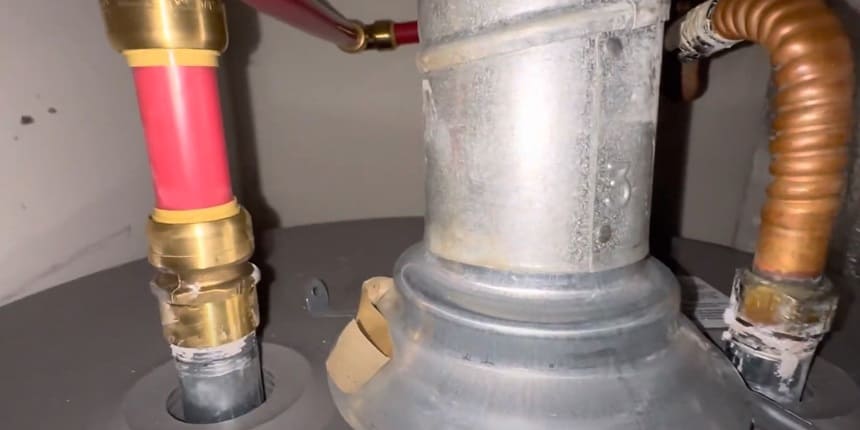
Attaching Pex To Inlet And Outlet
Begin by identifying the cold-water inlet and hot-water outlet on your water heater. This is where you’ll attach your PEX tubing. Ensure that your water heater is turned off and that all water pressure has been relieved.
Measure and cut the PEX tubing to the required length using a PEX cutter. A clean cut ensures a better fit and reduces the risk of leaks. Slide a PEX crimp ring onto the tubing, and then insert a PEX fitting into the tube.
Push the tubing onto the water heater’s inlet and outlet ports, ensuring a snug fit. This step might remind you of connecting garden hoses.
Using Crimp Or Clamp Rings
Now that your PEX is attached, it’s time to secure it with a crimp or clamp ring. Both methods are effective, but your choice may depend on the tools you have available.
For crimp rings, position the ring about 1/8 inch from the end of the tubing.
Use a crimping tool to compress the ring firmly around the tubing. You should see a uniform crimp all around the ring. If you prefer clamp rings, slide the clamp over the tubing and fitting connection.
Use a clamp tool to tighten it securely. This method is often praised for being more forgiving and easier to use. Whichever method you choose, test the connection by turning the water on slowly and checking for leaks.
Tighten the rings if necessary, or re-crimp the connections. Have you ever wondered why so many people are switching to PEX?
Its ease of use and reliability are just a few reasons. Imagine a future free from the headaches of leaky pipes.
By fitting PEX to your water heater, you’re not just making a connection, you’re investing in a more efficient and stress-free home plumbing system.
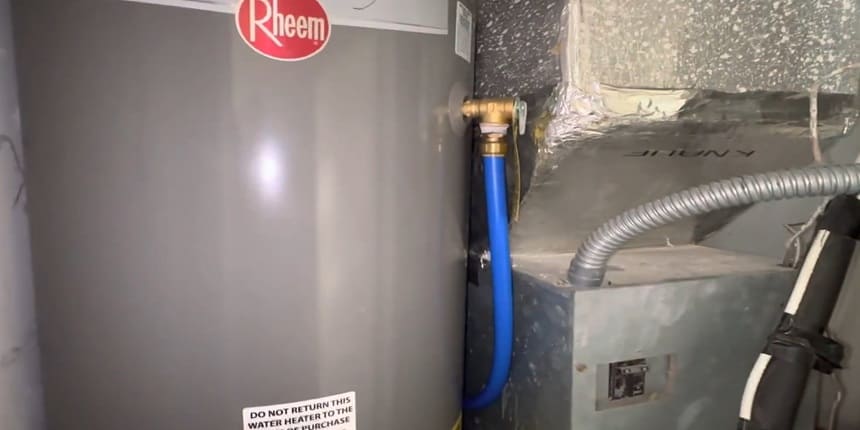
Testing The Connecting Pex to Electric
Connecting PEX to a water heater involves straightforward steps.
First, turn off the water supply. Then, attach the PEX tubing using the correct fittings, ensuring a secure connection.
Testing the connection between your PEX tubing and water heater is crucial to ensure everything is functioning smoothly.
You’ve put in the effort to make the right connections, but how do you know if it’s all set? This step is about verifying your work and ensuring the installation will serve you reliably.
Checking For Leaks
Leaks can be sneaky and cause a lot of damage over time. The first thing you want to do is check every joint and connection. Turn on the water and closely inspect all areas where PEX meets the water heater. Use a flashlight if needed to spot any drips. Is there a spot that feels damp or looks suspicious? Place a dry paper towel around the joint and see if it gets wet. Finding leaks early can save you from potential water damage and costly repairs.
Ensuring Proper Water Flow
Proper water flow is a sign that your connection is solid. After checking for leaks, observe how the water runs from your heater. Does it flow smoothly without any interruptions? Listen for unusual noises like hissing or banging. If the flow seems off, check if any valves are partially closed or if there might be an obstruction in the tubing. A steady stream ensures your heater is working efficiently and your connection is secure. Testing your PEX connection involves simple yet crucial steps. Have you ever discovered a leak after feeling confident about your work? It’s a reminder that thorough testing is always worth the extra time. Each step is about safeguarding your home and ensuring peace of mind.
Maintaining Pex Connections
Connecting PEX to a water heater requires careful steps to ensure a secure fit. First, cut the PEX tubing to the needed length. Next, attach a PEX fitting to the end of the tubing, ensuring a tight seal. Finally, connect the fitting to the water heater outlet, securing it with appropriate clamps for safety.
Maintaining PEX connections is crucial for ensuring the longevity and efficiency of your water heater system. Proper maintenance not only prevents leaks but also saves you from costly repairs down the line. With just a little attention to detail, you can keep your PEX connections running smoothly for years.
Regular Inspections
Regular inspections are your first line of defense in maintaining PEX connections. Schedule a quick check-up every few months to spot any potential issues early. Look for signs of wear and tear or discoloration around the fittings. Make it a habit to check for any unusual noises or vibrations when the water heater is in use. These could indicate loose connections. Tightening them might just be the simple fix you need. Taking photos during inspections can be a great way to track changes over time. This visual record helps you notice subtle shifts that might otherwise be missed.
Troubleshooting Common Issues
Even well-maintained systems encounter issues occasionally. Knowing how to troubleshoot common problems can save you from unnecessary stress. If you find water pooling near your water heater, it might be due to a loose PEX connection. Inspect the affected area and tighten any loose fittings. If the problem persists, consider replacing the PEX tube as it might be damaged. Another common issue is fluctuating water temperatures. This could be a sign of air pockets in the PEX tubing. Bleeding the system can resolve this, restoring consistent temperatures. Remember, every problem has a solution. If you feel stuck, seeking advice from a professional can offer clarity and peace of mind. Are you confident in identifying these issues during your inspections? Regular maintenance empowers you to handle minor repairs on your own, ensuring a reliable water heater system.
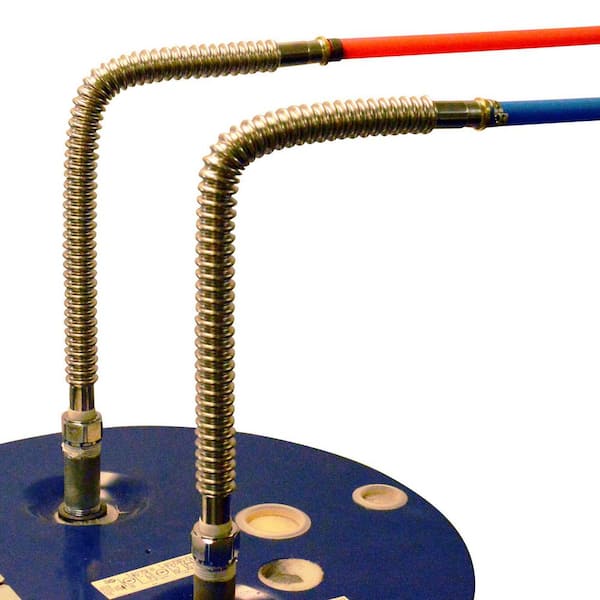
Credit: www.homedepot.com
Credit: www.reddit.com
Frequently Asked Questions
Can I Connect Pex Directly To A Water Heater?
PEX can connect to a water heater, but use a metal transition fitting. This prevents heat damage. Ensure local codes allow PEX connections. Always follow manufacturer guidelines for safe installation. Proper insulation helps maintain efficiency and prevents issues. Consult a professional for complex installations or if unsure.
Can Pex Be Used For Water Heater Discharge Pipe?
PEX is not suitable for water heater discharge pipes. It can’t handle high temperatures from discharged water. Instead, use metal pipes designed for high-temperature applications. Proper installation ensures safety and compliance with plumbing codes. Always consult local regulations or a professional plumber for guidance.
Can You Use Sharkbite Fittings On A Hot Water Heater?
SharkBite fittings are not recommended for direct connection to a hot water heater. Use approved connectors instead. Ensure compatibility by checking manufacturer guidelines before installation. Proper installation ensures safety and efficiency.
What Type Of Pex For Hot Water Heater?
Use PEX tubing labeled “PEX-A” for hot water heaters. It withstands high temperatures and pressure, ensuring durability. Opt for red-colored PEX to easily identify hot water lines. PEX-A offers flexibility and resistance to expansion, making it ideal for plumbing applications involving hot water systems.
Conclusion
Connecting PEX to your water heater is simple with the right steps. Always ensure you have the proper tools. Safety should be your top priority. Follow the guidelines for a successful installation. Double-check connections to prevent leaks. This process can improve your home’s plumbing system.
Now, you’re ready to enjoy a reliable water supply. Remember to consult a professional if needed. Keep learning and practicing for better results. Enjoy the benefits of your efforts.