Is your RV water heater bypass valve leaking? If so, you’re not alone—and it’s a problem you need to fix fast.
A small leak can lead to bigger issues like water damage, wasted energy, and costly repairs. You might feel frustrated or unsure about what to do next. Don’t worry. This article will guide you step-by-step to understand why the valve leaks, how it affects your RV, and what simple solutions you can try right now.
Keep reading to protect your RV and enjoy worry-free travels.
Common Causes Of Valve Leaks
Leaks in an RV water heater bypass valve can cause water damage and waste. Understanding the common causes helps you spot problems early. Fixing these issues prevents bigger repairs and keeps your RV running smoothly.
Worn Out Seals
Seals inside the valve keep water from leaking out. Over time, these seals wear down or dry out. Worn seals lose their tight fit and allow water to escape. Replacing old seals often stops the leak.
Loose Connections
Connections between pipes and the valve must be tight. Vibration from driving can loosen these joints. Loose connections create gaps where water can drip. Checking and tightening fittings usually solves this issue fast.
Cracked Valve Body
The valve body is made of plastic or metal. Cracks can form from stress or freezing temperatures. A cracked valve leaks water continuously and needs replacement. Inspect the valve body regularly for any damage signs.

Credit: www.fondationvalentinhauy.fr
Tools And Materials Needed
Fixing a leaking RV water heater bypass valve needs the right tools and materials. Using proper items helps make the repair easier and safer. It also saves time and prevents extra damage.
Gathering everything before starting avoids stops in the middle of the job. Here is a list of what you need for the repair.
Basic Repair Kit
A basic repair kit includes common tools for plumbing fixes. You need an adjustable wrench to loosen and tighten fittings. A flathead screwdriver helps remove clamps or covers. Teflon tape is essential to seal pipe threads and stop leaks. A small bucket can catch any water that drips during the repair.
Replacement Parts
The bypass valve or its seals may need replacing. Have the correct valve model for your RV water heater. Also, get new rubber O-rings or washers. These parts prevent water from leaking around joints. Check the size and type before buying to ensure a good fit.
Safety Gear
Wear safety gloves to protect your hands from sharp parts and hot water. Eye protection is important to avoid splashes during repair. Use old clothes or a work apron to keep clean. Make sure the RV water heater is off and cool before starting work.
Step-by-step Valve Inspection
Inspecting the RV water heater bypass valve is key to fixing leaks. Follow these clear steps to check the valve carefully. This helps find problems fast and keeps water from leaking out.
Shutting Off Water Supply
Turn off the main water supply to your RV. This stops water flow and prevents spills. Use the valve near the water tank or pump. Make sure no water pressure is left in the pipes.
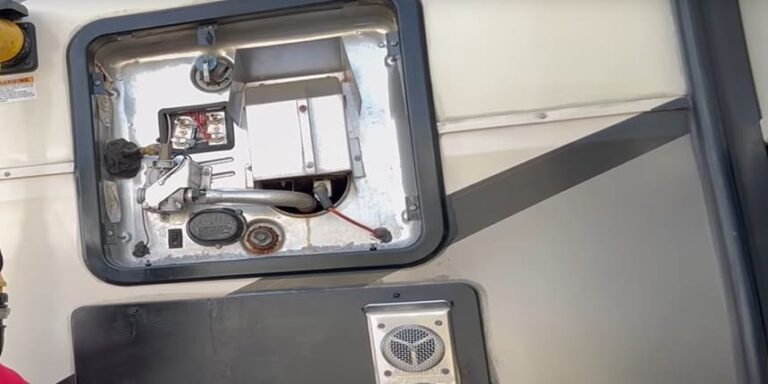
Checking For Visible Damage
Look closely at the bypass valve and surrounding pipes. Search for cracks, rust, or worn parts. Check seals and connections for signs of wear. Damage here can cause water to leak out.
Testing Valve Operation
Move the valve handle slowly to open and close it. Listen for unusual sounds or resistance. Water should stop flowing completely when closed. Test several times to confirm the valve works well.
Quick Fixes To Stop The Leak
Leaks from an RV water heater bypass valve can cause water damage and waste. Quick fixes help stop the leak fast. These simple steps save time and money. You can do them with basic tools and parts. Follow these tips to fix leaks and keep your water heater working well.
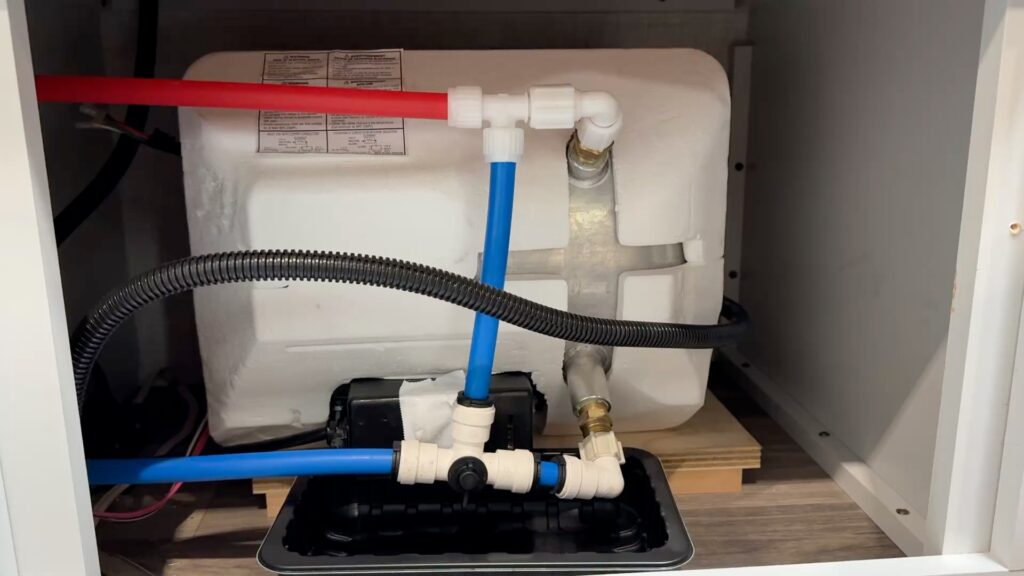
Tightening Loose Fittings
Loose fittings often cause leaks. Use a wrench to gently tighten the valve connections. Turn slowly and check for leaks after each turn. Avoid over-tightening to prevent damage. Tightening stops water from seeping out around joints.
Replacing Seals And Washers
Old seals and washers wear out and crack. Remove the valve and check these parts inside. Replace any damaged or stiff seals with new ones. New seals create a tight barrier to stop water leaks. This fix often solves leaks quickly.
Applying Thread Seal Tape
Thread seal tape helps seal pipe threads. Wrap the tape around the valve threads before reconnecting. Wrap in the same direction as the threads to avoid unraveling. This tape fills gaps and prevents water from leaking. It is cheap and easy to use.
When To Replace The Bypass Valve
Replacing the RV water heater bypass valve is necessary when it shows signs of damage or leaks. A faulty valve can cause water loss and reduce your heater’s efficiency. Knowing when to replace it helps avoid bigger problems and costly repairs. Regular checks ensure your RV’s water heater works properly during every trip.
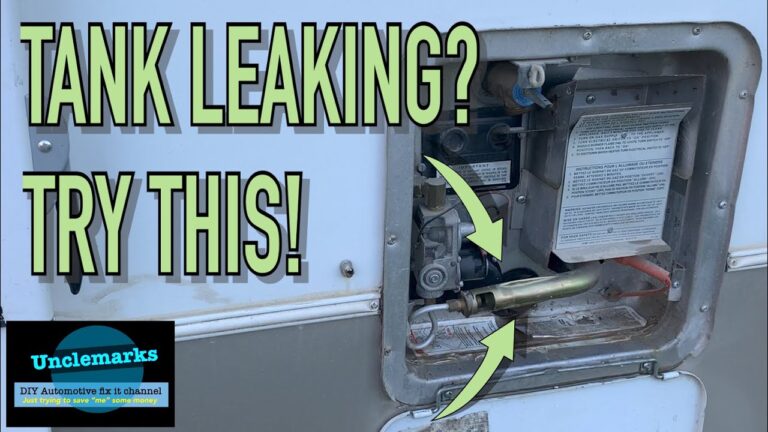
Signs Of Severe Damage
Look for cracks or visible wear on the bypass valve. Water dripping or pooling under the valve signals a leak. If the valve feels loose or hard to turn, it may be failing. Rust or corrosion around the valve also means replacement is needed. These signs show the valve cannot seal properly anymore.
Choosing The Right Replacement
Select a bypass valve that matches your water heater model. Check the size and connection type carefully. Use valves made from durable materials like brass or high-grade plastic. Avoid generic parts that may not fit well. Quality parts last longer and prevent future leaks.
Installation Tips
Turn off water and power before replacing the valve. Drain the water heater to avoid spills. Use plumber’s tape on threads to ensure a tight seal. Tighten the valve by hand, then slightly with a wrench. Avoid over-tightening to prevent damage. Test the new valve for leaks before use.

Credit: www.youtube.com
Preventing Future Leaks
Preventing leaks in your RV water heater bypass valve saves time and money. Taking a few simple steps helps keep your system safe and dry. Regular checks and proper care stop small problems from growing. Understanding the right methods protects your RV’s plumbing during all seasons.
Regular Maintenance
Check the bypass valve often for signs of wear or damage. Tighten any loose fittings to stop drips. Clean the valve and surrounding area to prevent dirt buildup. Replace seals or washers if you notice cracks or leaks. Keep a maintenance schedule to catch problems early.
Proper Winterizing Techniques
Drain water from the heater and bypass valve before cold weather. Use antifreeze designed for RV systems to avoid freezing damage. Follow the manufacturer’s instructions for winterizing your water heater. Avoid leaving water inside the valve during freezing temperatures. Proper winter care prevents cracks and leaks.
Avoiding Common Mistakes
Do not overtighten the valve fittings; this can cause damage. Avoid using harsh chemicals that harm seals and valves. Never skip regular inspections or ignore small leaks. Use the correct tools for repairs and replacements. Careful handling extends the life of your bypass valve.
Credit: johnmarucci.com
Frequently Asked Questions
What Causes An Rv Water Heater Bypass Valve To Leak?
Leaking often happens due to worn-out seals or loose fittings in the bypass valve. Age and frequent use can degrade valve parts, causing leaks.
How Can I Fix A Leaking Bypass Valve In My Rv?
Tighten loose connections first. If the leak persists, replace the valve seals or the entire bypass valve for a proper fix.
Is A Leaking Bypass Valve Dangerous For Rv Water Systems?
Yes, leaks can cause water damage and reduce heater efficiency. Prompt repair prevents costly damage and maintains system performance.
Can I Prevent Rv Bypass Valve Leaks With Regular Maintenance?
Regularly inspect and clean the valve. Replace seals yearly to ensure tight, leak-free operation and prolong valve life.
Conclusion
A leaking RV water heater bypass valve can cause water waste and damage. Fixing it quickly saves water and keeps your RV safe. Regular checks help catch leaks early. Use simple tools to repair or replace the valve. Small problems do not have to turn into big ones.
Keep your RV water system working well for a smooth trip. Taking care of leaks protects your comfort on the road. Stay alert and act fast to avoid bigger issues. Your RV deserves good care for many adventures ahead.