Are you wondering how to safely and efficiently vent your gas water heater through an exterior wall?
If you want to avoid costly repairs, reduce risks, and keep your hot water flowing smoothly, understanding the proper venting methods is a must. You’ll discover clear, step-by-step guidance on venting your gas water heater through the wall so you can feel confident that your setup is both safe and effective.
Keep reading to learn exactly what you need to know.

Choosing The Right Vent
Choosing the right vent for a gas water heater through a wall is important. The vent helps remove harmful gases safely outside your home. Picking the correct vent ensures your heater works well and stays safe. There are a few key points to consider.
Power Vent Heaters: Use a blower to push exhaust out horizontally.
Direct Vent Heaters: Pull in outside air and push out exhaust through a dual channel pipe.
Types of Water Heater Vent Materials
Vents come in different materials like aluminum, stainless steel, and PVC.
Aluminum vents are common and affordable.
Stainless steel vents last longer and resist rust.
PVC vents suit some newer, high-efficiency heaters.
Choose a material that fits your heater’s requirements and your home’s climate. Proper material helps avoid leaks and damage.
Sizing The Water Heater Vent Properly
Correct water heaters vent size is crucial for safe gas flow. Too small vents cause poor air flow and gas buildup. Too large vents may reduce heater efficiency.
Check your heater’s manual for the right vent size. Measure the vent pipe diameter and length carefully. Proper sizing keeps your water heater running smoothly.
Identifying The Water Heater Vent
Place the vent outgoing where gases can leave safely. Avoid areas near windows, doors, or air intakes.
The water heaters vent should be high enough to prevent blockage from snow or debris. Also, make sure the vent is easy to access for cleaning. Proper location protects your family from dangerous gases.
Preparing The Installation Gas Water Heater
Preparing the installation site for a vent gas water heater through the wall is an important step.
It ensures the heater works safely and efficiently. Proper preparation avoids future problems and keeps your home safe.
Checking Wall Structure
Start by examining the wall where the heater will go. Make sure the wall can hold the vent pipe. Look for pipes, wires, or studs inside the wall.
Avoid cutting into these. Use a stud finder for accuracy. A solid, clear wall section is best for installation.
Marking The Vent Hole
Next, mark the spot for the vent hole carefully. Measure the vent pipe size before marking. Use a level to keep the hole straight.
Mark the center and outline the hole size. Double-check measurements to prevent mistakes. A precise hole helps the vent fit well and work properly.
Ensuring Clearance And Safety
Clearance around the vent is essential. Keep space from windows, doors, and flammable materials.
Check local codes for safety distances. Proper clearance stops heat damage and allows good airflow. Make sure the vent does not block walkways or create hazards.
Cutting The Wall Opening
Cutting the wall opening is a key step in installing a vent gas water heater through a wall. This step creates the space needed for the vent pipe to pass outside safely.
It requires accuracy and care to avoid damage to the wall and ensure proper venting. Follow clear steps to make the process smooth and safe.
Tools Needed
Gather tools before starting. You will need a drill, a drywall saw, a measuring tape, and a pencil.
A level helps mark straight lines. Safety gear like gloves and goggles is important too. Prepare all tools to work efficiently.
Safe Cutting Techniques
Mark the exact spot for the hole using measurements from the heater instructions. Cut slowly with the drywall saw.
Keep your hands steady to avoid mistakes. Check for wires or pipes inside the wall before cutting. Work carefully to keep the opening neat and the wall safe.
Cleaning The Opening
Remove loose debris and dust from the cut edges. Use sandpaper to smooth rough spots.
Cleaning helps the vent pipe fit tightly and prevents leaks. Keep the area clear to prepare for the next installation step.
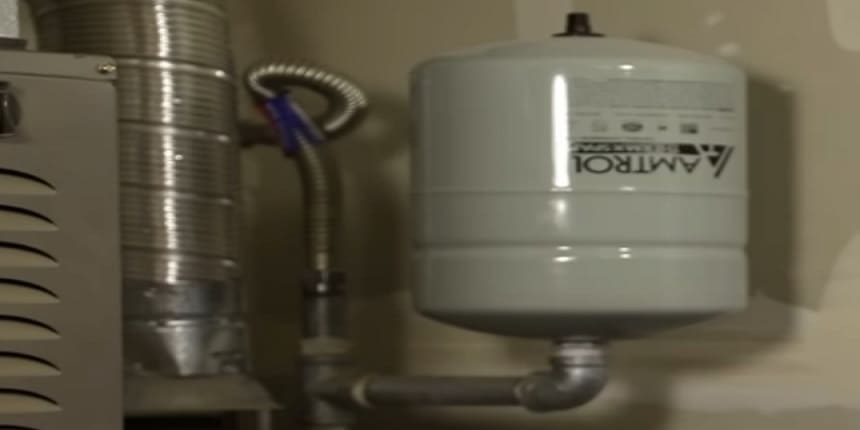
Installing The Vent Pipe
Installing the vent pipe for a vent gas water heater through the wall is a key step. It ensures safe and efficient venting of gases outside your home. Proper installation avoids leaks and keeps your home safe.
Assembling Vent Sections
Start by gathering all vent pipe sections. Connect each piece firmly, ensuring a snug fit. Use the correct orientation for each section.
Check the manufacturer’s guide for proper alignment. Avoid gaps or loose connections to prevent leaks.
Sealing Joints
Apply high-temperature sealant to each joint. This stops gas from escaping through cracks. Use a sealant made for vent pipes only.
Smooth the sealant evenly around the joint. Let it dry completely before proceeding.
Securing The Pipe In Place
Attach brackets or straps to hold the vent pipe steady. Fix these supports to the wall securely. Space supports evenly to avoid sagging. Ensure the pipe stays straight and stable. This keeps the vent working well over time.
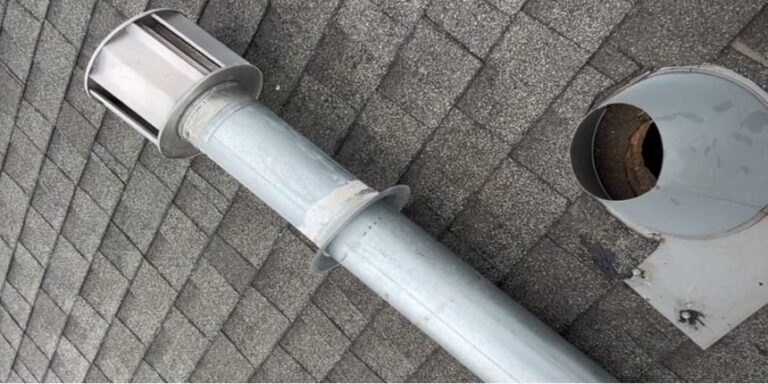
Attaching The Vent Cap
Attaching the vent cap is a key step in installing a vent gas water heater through the wall. The vent cap controls the flow of exhaust gases outside.
It also protects the vent pipe from rain, debris, and pests. Proper installation ensures safety and keeps your water heater working well.
Choosing A Vent Cap Style
Pick a vent cap that fits your wall and vent pipe size. Common styles include mushroom, turbine, and louvered caps.
Each style offers different levels of protection against wind and rain. Choose one that suits your climate and vent location.
Make sure the cap material is rust-resistant, like aluminum or stainless steel.
Mounting The Cap
Secure the vent cap firmly to the wall. Use screws designed for exterior use. Align the cap so the vent pipe fits tightly inside.
Avoid gaps that let air or water enter. Tight mounting reduces noise and prevents the cap from loosening over time. Check the manufacturer’s instructions for the best mounting method.
Weatherproofing Around The Cap
Seal the area around the vent cap with weatherproof caulk. This stops water from leaking into your wall. Apply caulk evenly and cover all edges.
Use flashing tape under the cap if needed for extra protection. Proper weatherproofing extends your wall’s life and prevents mold growth inside.
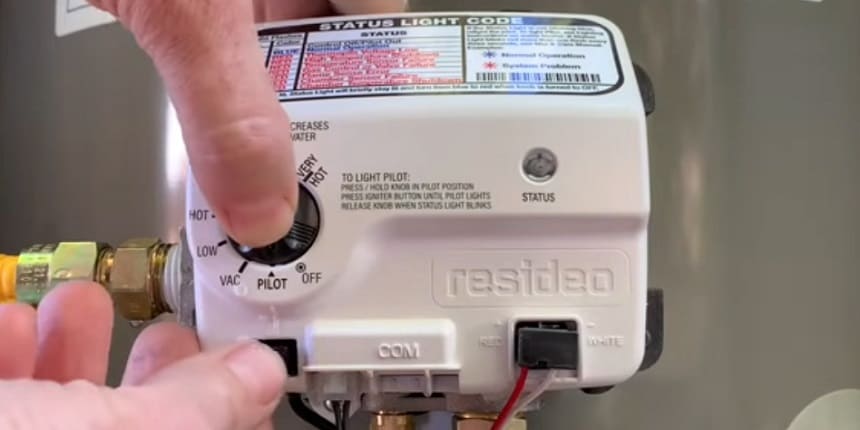
Testing And Final Checks
Testing and final checks are key after installing a vent gas water heater through the wall. These steps ensure the heater works safely and efficiently.
Proper testing helps avoid leaks, poor drafts, and safety risks. Spend time on these checks for peace of mind and long-lasting performance.
Inspecting For Leaks
Start by checking all gas connections carefully. Use a soapy water solution on joints and fittings. Look for bubbles, which mean gas leaks.
Tighten connections if bubbles appear. Never ignore a gas smell or sound of hissing. Fix leaks immediately to prevent danger.
Verifying Proper Draft
Check that exhaust gases exit smoothly through the vent. Use a draft gauge or smoke test near the vent.
Smoke should flow outside without backing up inside. Poor draft causes harmful gases to build up indoors.
Adjust the vent or heater settings if needed. This step protects your health and home.
Safety Precautions
Turn off the gas supply before any adjustments. Keep a fire extinguisher nearby during testing. Make sure the area is well ventilated and free of flammable materials.
Never skip safety checks or rush the process. Follow manufacturer instructions strictly for safe operation. Safety comes first with any gas appliance.
Conclusion
Proper venting of your gas water heater is important for safety. Venting through the wall saves space and allows fresh air to flow.
Always follow local codes and use the right materials. Regular checks help prevent leaks and blockages. A well-vented system keeps your home safe and warm.
Simple steps can avoid costly repairs or hazards. Choose quality parts and install carefully. This ensures your water heater works well for years.