Picture this: you step into your bathroom, ready to start your day, only to find a puddle of water creeping across the floor. Your heart sinks as you trace it back to your water heater.
It’s leaking around the element, and you’re left wondering what to do next. You might feel a mix of frustration and urgency, wanting to fix the problem before it escalates. You’re not alone. Many homeowners face this issue, and it’s crucial to address it before it leads to bigger headaches like water damage or increased energy bills.
We’ll guide you through understanding why this happens, how to spot the signs, and what steps you can take to resolve it. By the end, you’ll be equipped with the knowledge to tackle the problem confidently, ensuring your home remains a safe and dry haven. Ready to dive in and reclaim peace of mind? Let’s get started.
Identifying Water Heater Leaks
Water heaters can leak for various reasons. Catching these leaks early can save money and prevent damage. Understanding leak signs and their sources is crucial. It helps in addressing the issue promptly.
Common Leak Signs
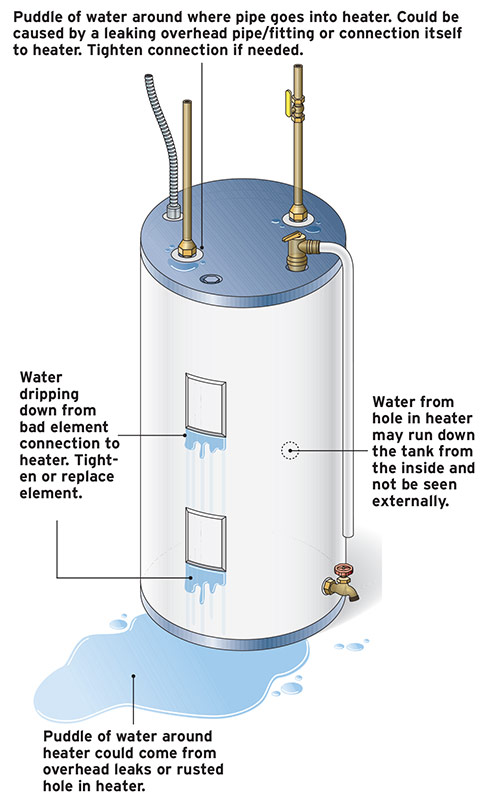
Water puddles near the heater indicate a leak. Rusty water also suggests a potential issue. Listen for hissing sounds or see steam. These signals often mean a leak has started. Unusual water bills can also hint at leaks. Regular checks can help spot these signs early.
Locating The Source
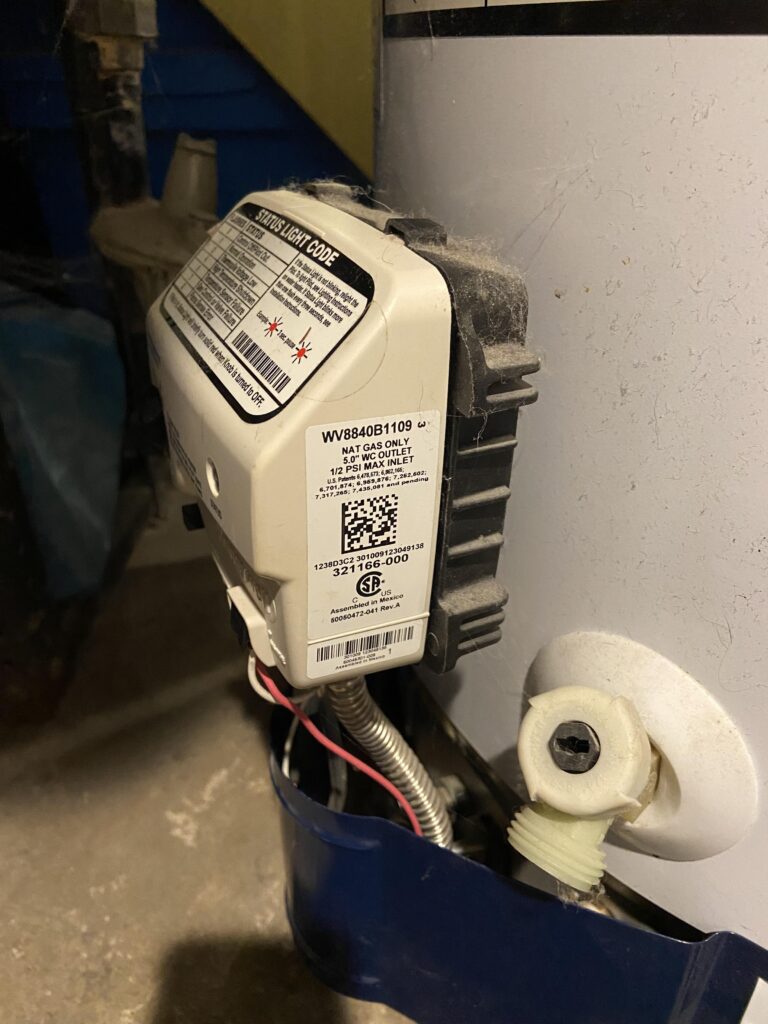
Finding a leak’s source can be tricky. Start by checking the tank’s bottom. Look for water pooling around it. Inspect the pressure relief valve. It might be leaking if it’s wet. Examine the water inlet and outlet pipes. These connections often develop leaks over time.
Check the thermostat and heating element areas. Leaks here are common due to worn gaskets. If unsure, it’s wise to consult a professional. They have tools to pinpoint leaks accurately.
Causes Of Element Leaks
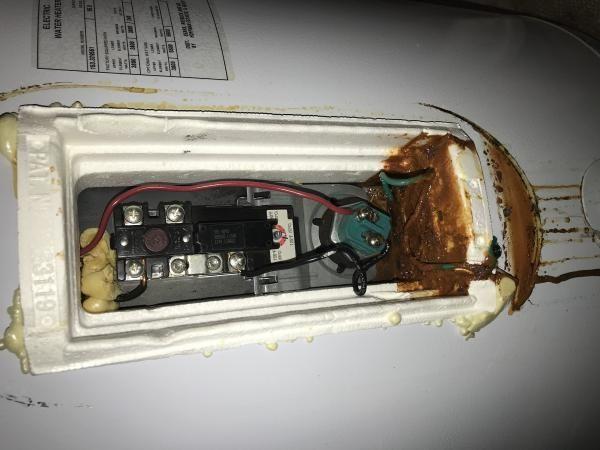
Water heater leaks often occur around the element due to corrosion. Loose connections can also cause water seepage. Regular maintenance helps prevent these issues.
Water heater leaks around the element can be a frustrating issue, often leading to increased energy bills and potential water damage. Understanding the causes of these leaks is crucial in preventing them and maintaining the efficiency of your water heater. Two primary factors are usually at play: corrosion and installation errors. Let’s dive deeper into these causes to help you identify and rectify issues before they escalate.Corrosion Factors
Corrosion is a leading cause of leaks around water heater elements. This often occurs when your water heater’s tank lining begins to degrade. Minerals in the water, especially in areas with hard water, can accelerate this process. Over time, this leads to rust and weakens the element, causing leaks. Regular maintenance and water softeners can help mitigate these issues. By checking the anode rod and replacing it when necessary, you can extend the lifespan of your water heater. Have you ever noticed a rusty tint in your water? This could be an early sign of corrosion. Addressing it promptly can prevent costly repairs down the line.Installation Errors
Installation errors are another common culprit behind leaks. An improperly installed element might not be sealed correctly. This leaves room for water to escape, leading to leaks. Ensure that the heating element is tightly and correctly fitted during installation. Consulting with a professional can save you from future headaches. If you decide to do it yourself, follow the manufacturer’s instructions closely. A small oversight can lead to significant problems. Have you ever tried installing a water heater element on your own? How did it go? Sharing your experiences could help others avoid similar pitfalls.Safety Precautions
Water heater leaks around the element require immediate attention to prevent damage. Turn off power and water supply before investigating. Inspect for worn-out gaskets or seals to ensure safety and avoid further issues.
Water heater leaks around the element can cause serious problems. Addressing the issue promptly is crucial. Safety should be your top priority before starting any repairs. These precautions help prevent injuries and further damage.Shutting Off Power
The first step is to turn off the power. For electric heaters, locate the circuit breaker. Switch it to the “off” position. This prevents electrical accidents. Gas heaters require turning the gas valve off. This ensures no gas leaks occur. Always double-check the power is off before proceeding.Draining The Tank
Draining the water heater tank is essential. It reduces pressure and prevents water spills. Attach a garden hose to the drain valve. Place the other end in a safe drainage area. Open the valve to let the water flow out. This step helps you work safely and efficiently.Repairing Leaks Around Element
Water heater leaks are a common headache, especially when they occur around the element. If you’ve noticed puddles forming beneath your heater, it’s time to spring into action. Repairing leaks around the element not only prevents water waste but also saves you from potential damage to your home. Let’s dive into two practical solutions that can help tackle this issue effectively.
Replacing The Gasket
The gasket is a crucial component that prevents leaks around the water heater element. Over time, it can wear out or degrade due to exposure to heat and water. Replacing a faulty gasket is a straightforward process that you can manage without calling a professional.
Begin by turning off the power to your water heater. Drain the tank to avoid spills and ensure safety. Remove the element cover and carefully take out the old gasket. You’ll be amazed at how much a simple gasket swap can stop leaks instantly. With a new gasket in place, your water heater will be back to functioning smoothly.
Wondering where to find a replacement? Most hardware stores stock them, and they’re quite affordable. It’s a small investment that can save you from costly repairs down the road. Don’t let a worn gasket be the weak link in your water heater’s performance.
Tightening The Element
Sometimes, the issue isn’t with the gasket but with the element itself. A loose element can lead to leaks, and the solution might be as simple as tightening it. Ensuring it’s secure can stop water from seeping out.
Grab a wrench and tighten the element firmly. You’ll feel the confidence of a DIY expert as you turn the wrench. This small action can have a significant impact, saving you from the hassle of water damage.
Be cautious, though. While tightening, ensure you don’t overdo it, as this can damage the threads or the element itself. A snug fit is what you’re aiming for. Do you feel the satisfaction of a job well done? Your water heater is now secure, and you can rest easy knowing leaks are not a concern.
Repairing leaks around the element is a task you can confidently tackle on your own. With these practical tips, you’re equipped to handle minor issues that could otherwise escalate. So, next time you spot a leak, remember: a little DIY effort can go a long way in maintaining your water heater’s efficiency.
Tools Needed For Quick Fixes
When you find your water heater leaking around the element, a sense of urgency kicks in. You want to fix it quickly and efficiently. Luckily, having the right tools at your disposal can make a world of difference. Whether you’re a DIY enthusiast or simply trying to avoid a hefty plumbing bill, understanding the essentials can empower you to tackle the problem head-on. Let’s delve into what you’ll need for a successful quick fix.
Essential Tools
First and foremost, you need a trusty wrench. A good adjustable wrench can make loosening and tightening bolts a breeze. It’s one tool that’s indispensable for this task.
Another must-have is a screwdriver. Depending on your water heater model, you’ll need either a Phillips or flathead screwdriver to remove the panel covering the element.
A multimeter is crucial for checking the electrical components. This tool ensures your safety by confirming whether the element is receiving power.
Plumbers tape is also essential. It helps seal any connections you’ve loosened and prevents future leaks.
Finally, don’t forget about a bucket or basin. This will catch any water that escapes during your repair process.
Optional Equipment
If you want to make the job even easier, consider using a socket wrench set. These can provide better grip and more leverage, especially in tight spaces.
Having a flashlight can be incredibly helpful. It ensures you can see clearly, especially if your water heater is in a dimly lit area.
A voltage tester might sound like overkill, but it gives an extra layer of safety. Double-checking your multimeter readings can prevent nasty shocks.
Work gloves aren’t strictly necessary, but they can protect your hands from sharp edges and hot surfaces.
Lastly, a rag or towel is useful for quick clean-ups. It helps you keep the area tidy and prevents slipping on any spilled water.
With these tools, you’re well-equipped for a quick fix. But why stop there? Could adding a couple of optional tools make your job even easier? Think about it. Your home repair journey can be smoother and safer with just a little preparation.
Credit: www.doityourself.com
Preventing Future Leaks
Dealing with a leaking water heater can be frustrating, especially when the leak is around the element. You might have faced this issue before, making it crucial to learn how to prevent future leaks. Understanding what steps you can take to avoid this common problem can save you time and money, and ensure your water heater lasts longer.
Regular Maintenance Tips
Regular maintenance is key to preventing leaks. Start by checking your water heater’s temperature and pressure settings. Ensure they are within the recommended limits to avoid unnecessary stress on the elements.
Draining your water heater annually can help remove sediment buildup. This simple step can prevent corrosion and extend the life of your heater. Remember, a small amount of effort can lead to significant savings.
Another tip is to inspect the area around the element for any signs of wear. Look for cracks or rust, which could indicate a potential leak. Addressing these early can prevent more severe issues down the line.
Checking For Corrosion
Corrosion is a common cause of leaks. Regularly check the element for any signs of rust or wear. If you notice discoloration or flaking, it might be time to replace the element.
Consider installing a water softener if your area has hard water. Hard water accelerates corrosion, leading to leaks. A water softener can help reduce mineral deposits, protecting your heater.
Inspect the anode rod, a crucial component in preventing corrosion. If the rod is worn out, replace it to keep the elements in good shape. This small action can make a big difference in preventing leaks.
Have you ever ignored a small leak, thinking it wasn’t a big deal? It’s easy to overlook, but even minor leaks can lead to significant damage over time. What steps will you take today to protect your water heater?
When To Call A Professional
Water pooling around the water heater element signals a need for professional help. Ignoring this might lead to bigger problems. Experts ensure safe repairs and help prevent future leaks.
Water heater leaks around the element can be a tricky situation. Sometimes, a quick fix might be all you need. But other times, it’s crucial to call a professional. Let’s explore when it’s time to get expert help.Complex Repairs
If your water heater problem involves more than a simple part replacement, it’s best to call a professional. Complex repairs can include tasks like rewiring or dealing with intricate plumbing connections. These tasks require specific skills and tools that only experienced technicians have. A friend once tried to fix his water heater himself and ended up causing more damage. He realized it was more cost-effective to hire someone than to fix the chaos he had created. Are you willing to risk a similar scenario?Signs Of Severe Damage
Keep an eye out for signs of severe damage like water pooling around the base or significant rust. These could indicate a larger issue, such as a failing tank. If left unchecked, it could lead to a complete system failure. If your water heater has been around for years, the chances of severe damage are higher. Is your water heater showing its age? It’s better to seek professional advice before it’s too late. Professionals can assess whether a repair or replacement is needed. They can provide you with the best options tailored to your situation. Why gamble with your home’s safety when expert help is just a call away? Don’t wait until a small issue becomes a major headache. Knowing when to call a professional can save you time, money, and stress. Make sure you act swiftly when signs of trouble appear.
Credit: www.youtube.com
Credit: www.finehomebuilding.com
Frequently Asked Questions
Why Is My Water Heater Leaking Around The Element?
A leak around the element often indicates a loose or damaged seal. Over time, seals can wear out, causing water to escape. Tightening the element or replacing the gasket can fix this issue. Regular maintenance can prevent similar leaks in the future.
How Do I Fix A Leaking Water Heater Element?
First, turn off the power and water supply. Drain the tank partially to access the element. Tighten the element or replace the gasket if necessary. Ensure all connections are secure before restoring power and water. Regular checks can prevent future leaks.
Can A Leaking Element Cause Other Issues?
Yes, a leaking element can lead to bigger problems. It may cause water damage to surrounding areas and increase electricity bills. If not addressed, leaks can lead to rust, reducing the heater’s lifespan. Prompt repair can prevent further damage.
Is It Safe To Use A Leaking Water Heater?
No, using a leaking water heater is not safe. Leaks can lead to electrical hazards and water damage. They can also increase energy consumption. It’s important to address leaks immediately to ensure safety and efficiency. Regular inspections can help identify issues early.
Conclusion
Fixing a water heater leak around the element is crucial. Ignoring it can lead to bigger issues. Regular inspections help catch problems early. Tighten connections and check seals often. This prevents unwanted leaks. Replace damaged parts promptly to ensure efficiency.
Remember, safety first when handling repairs. Turn off the power before starting any work. Seeking professional help can be wise for complex repairs. Taking these steps ensures your water heater runs smoothly. Always prioritize maintenance to save money and stress.
A little effort now can prevent costly future repairs. Keep your water heater in top condition.