Is your water heater not working right? The gas control valve might be the problem.
Knowing how to replace this part can save you money and hassle. In this guide, you’ll learn simple steps to fix your water heater safely and quickly. By the end, you’ll feel confident tackling this repair on your own. Keep reading to get your hot water flowing again without waiting for a costly plumber.
Tools And Materials Needed
Replacing a gas control valve on a water heater needs the right tools and materials. Having them ready makes the job safer and faster. It helps avoid mistakes during the repair.
Gather everything before starting. This way, you won’t stop halfway to find what you need. Each tool and material has a role in the process.
Basic Hand Tools
Use a wrench set to loosen and tighten nuts and bolts. Screwdrivers, both flathead and Phillips, help remove screws. Pliers assist in gripping and turning small parts.
Replacement Gas Control Valve
Get the correct valve model for your water heater. Check the brand and model number to match it exactly. Using the wrong valve can cause safety problems.
Pipe Thread Sealant Or Teflon Tape
Seal threads on gas pipe connections to prevent leaks. Use pipe thread sealant or Teflon tape. Wrap the tape clockwise around pipe threads before assembly.
Gas Leak Detector Solution
After installation, check for gas leaks. Use a gas leak detector spray or a soap and water mix. Apply it on the joints and watch for bubbles.
Safety Equipment
Wear safety gloves and goggles during the repair. Protect your eyes and hands from sharp parts and gas exposure. Work in a well-ventilated area for safety.
Credit: www.healingwithhorsesranch.org
Safety Precautions
Replacing a gas control valve on a water heater can be risky without proper safety steps. Gas leaks or electric shocks can cause serious harm. Following safety precautions protects you and your home.
Take time to prepare and avoid rushing. Safety is the first step to a successful repair.
Turn Off The Gas Supply
Locate the main gas valve near the water heater. Turn it off completely. This stops gas flow and lowers the risk of leaks or fire.
Shut Off The Power
Switch off the electricity to the water heater at the breaker box. This prevents electric shocks during the repair process.
Ventilate The Area
Open windows and doors to air out the room. Good airflow reduces the chance of gas buildup in case of leaks.
Wear Protective Gear
Use gloves and safety glasses to shield your hands and eyes. Protect yourself from sharp parts and hot surfaces.
Check For Gas Leaks
Use a gas leak detector or soapy water on connections. Watch for bubbles that show leaks. Fix leaks before proceeding.
Shutting Off The Water Heater
Before replacing the gas control valve on your water heater, you must shut off the unit safely. This step is important to avoid accidents and water damage. Follow these instructions carefully to prepare your water heater for repair.
Turn Off Gas Supply
Locate the gas valve near the water heater. Turn the valve handle to the off position. This stops the flow of gas to the heater. Never skip this step to prevent gas leaks or fire hazards.
Shut Off Water Supply
Find the cold water supply valve above the water heater. Turn the valve clockwise to close it. This stops water from entering the tank. It helps avoid spills while working on the valve.
Drain The Water Heater
Attach a hose to the drain valve at the tank’s bottom. Place the other end in a safe drainage area. Open the drain valve to let water flow out. Open a hot water faucet in your home. This allows air into the tank for smooth draining.
Credit: www.buildersliquidators.com
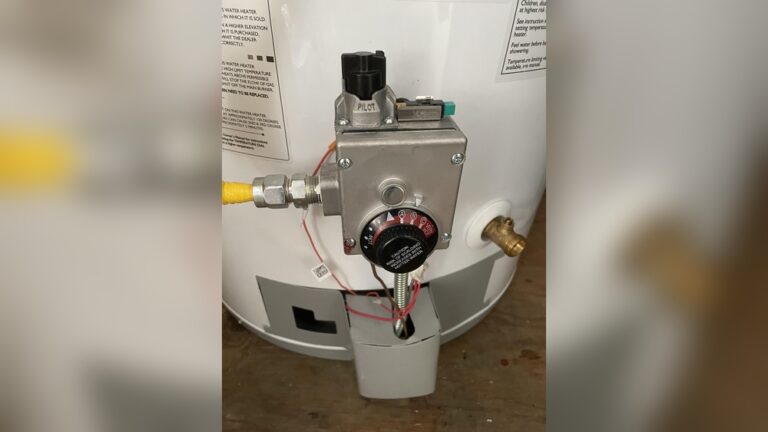
Removing The Old Gas Control Valve
Removing the old gas control valve is an important step in replacing it safely. This process requires careful handling to avoid gas leaks or damage. Follow these steps to remove the valve properly and prepare for the new one.
Accessing The Valve
Start by turning off the gas supply. Allow the water heater to cool down. Remove the access panel covering the gas control valve. Use a screwdriver to take off any screws holding the panel. This opens the area where the valve sits. Clear any dust or debris to see the valve clearly.
Disconnecting Gas And Thermostat Wires
Locate the wires connected to the gas control valve. These include gas lines and thermostat wires. Carefully disconnect the thermostat wires first. Use a wrench to loosen the gas line connection. Make sure the gas supply is off before loosening. Keep a cloth nearby to catch any drips.
Unscrewing The Valve
Check for screws or bolts holding the valve in place. Use the right screwdriver or wrench to remove them. Turn screws counterclockwise to loosen. Gently pull the valve away from the water heater. Avoid forcing it to prevent damage. Place the old valve in a safe spot for disposal.
Installing The New Gas Control Valve
Installing the new gas control valve is a key step in fixing your water heater. This part controls the gas flow and temperature, so it must be placed correctly. Follow these steps carefully to ensure safety and proper function.
Aligning And Securing The Valve
First, position the new gas control valve where the old one was removed. Make sure the valve fits tightly and lines up with the mounting holes. Use screws or bolts to secure the valve firmly. Do not overtighten, as this can damage the valve. The valve should sit flush against the water heater body. Check for a stable fit before moving on.
Reconnecting Gas And Thermostat Wires
Next, reconnect the gas line to the new valve. Tighten the connection to avoid any leaks. Then, attach the thermostat wires to their matching terminals. Make sure each wire connects to the correct spot. Loose wires can cause the heater to malfunction. Double-check all connections for safety and proper operation.

Credit: meserb.org
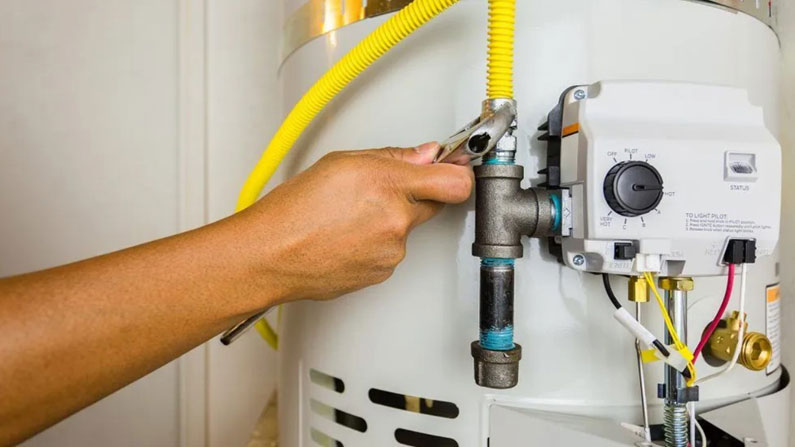
Testing The New Valve
Testing the new gas control valve is a key step after installation. It ensures the valve works safely and your water heater runs smoothly. Follow these steps carefully for best results.
Restoring Gas And Water Supply
Turn on the gas supply valve slowly. Open the water valve to let water flow into the heater. Watch for any unusual sounds or signs of pressure. This step readies the system for testing.
Checking For Leaks
Use a soapy water solution on all new connections. Look closely for bubbles forming. Bubbles mean gas is leaking and must be fixed. Never skip this safety check.
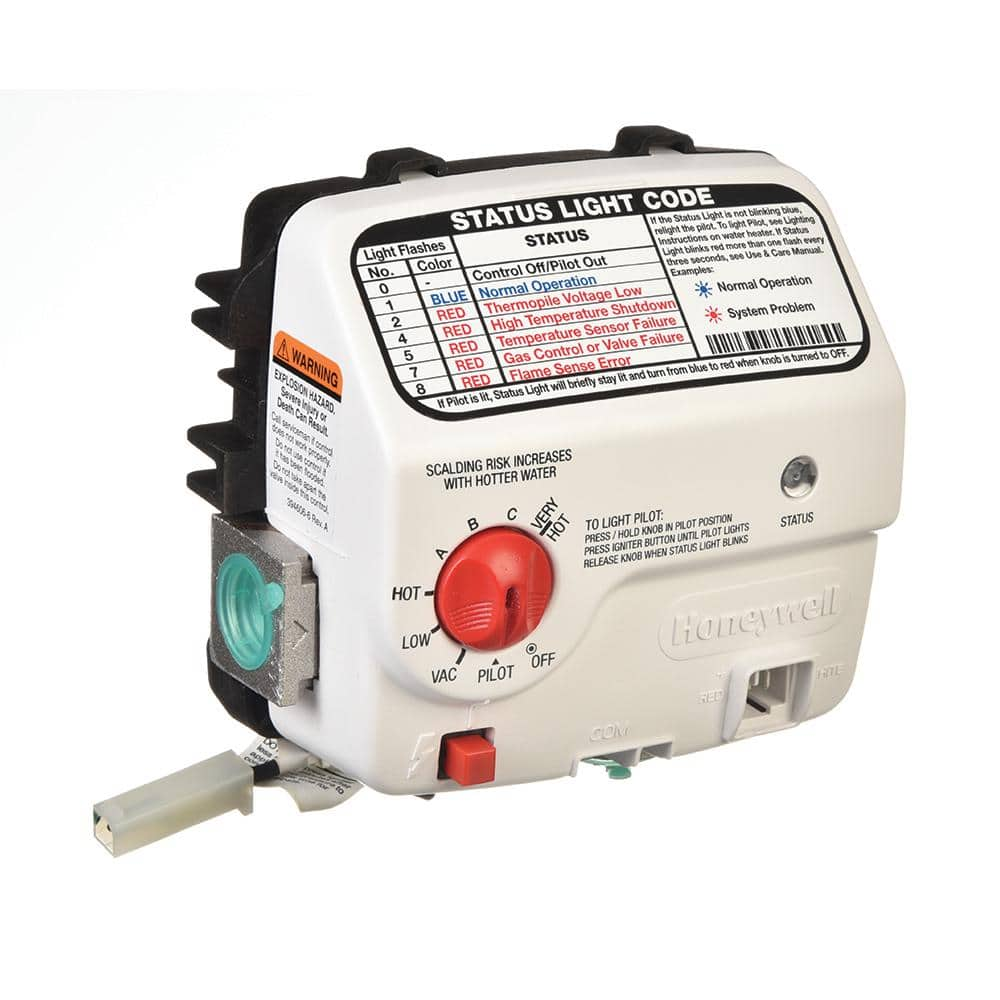
Lighting The Pilot
Follow the valve’s instructions to light the pilot. Hold down the control knob as needed. Wait for the pilot flame to stay on steadily. This confirms the valve operates properly.
Troubleshooting Common Issues
Troubleshooting common issues with a gas control valve helps save time and money. Identifying problems early keeps the water heater working well. Some problems are easy to fix without calling a professional. This section covers frequent issues and how to solve them safely.
Gas Control Valve Won't IgniteCheck if the pilot light is on. A weak or off pilot light stops ignition. Clean the pilot tube from dust or dirt. Make sure the gas supply valve is open. If the valve is faulty, it may need replacement.
Water Temperature FluctuatesThermostat settings can cause uneven water temperature. Adjust the thermostat to the desired level. A malfunctioning gas control valve may fail to keep temperature steady. Inspect the valve for damage or wear signs.
Gas Smell Near the Water HeaterTurn off the gas supply immediately. Check all connections for leaks using soapy water. Bubbles show a gas leak. Tighten loose fittings carefully. Replace any damaged parts to prevent hazards.
Water Heater Does Not HeatConfirm the gas control valve is set to “on.” Verify the pilot light is lit. A broken thermocouple can stop the heater from heating. Replace the thermocouple or the entire gas control valve if needed.
Valve Knob is Hard to TurnAccumulated dirt or corrosion can stiffen the knob. Clean the valve area gently with a cloth. Avoid using force to turn the knob. Lubricate the valve knob lightly if it remains stiff. Replace the valve if it is severely damaged.
Conclusion
Replacing the gas control valve on your water heater takes care and attention. Follow each step carefully for safety and success. Double-check all connections before turning the gas back on. This simple fix can save you money and extend your heater’s life.
Take your time and don’t rush the process. Now, your water heater should work smoothly and safely again. Ready to enjoy warm water without worry.